To watch the full video tutorial for this post click here: https://www.youtube.com/watch?v=RrZChZNhw2Q
Ok, so I know that carpet feels nice on your feet, and keeps you warm in the winter, and absorbs noise, blah, blah, blah. I am an American after all, who grew up in a house that had cozy wall-to-wall bright orange shag at one point. But have you ever stopped to consider what is really lurking in there? I mean, I’m pretty certain that the boys in my house use a men’s public restroom multiple times a day and then walk all over the carpet with the same shoes on. And then lay on it. And then eat food that dropped on it. There is a reason that we do not think about these things.
I would love to be one of those families that has a “no shoes” rule, but my hubs and kids would NEVER abide and then I would just have one more thing to police and be grumpy about. And if I’m really being honest, I may or may not use the carpet as a foot “wipe” myself when I feel crumbs on my feet. Don’t judge, you know you do it too!!
Anyway, the point of all this rambling is that my downstairs carpet was disgusting and had to go. I had been ripping at it in the corners carefully lifting up the corners for at least the past year to peek at what the slab looked like underneath because I have always loved the look of a sleek shiny floor and that is what I had in mind for this room. Not only was the carpet in my great room, but it was also under my kitchen bar stools, in the main traffic areas, and in the hallway where my back door goes into the garage. I have no clue what the original owners were thinking when they decided to put carpet leading to and from the garage, except they must have not owned any cars, toys, or greasy dirty garagey things.
Here is what my carpet looked like before, despite the fact that I do not live in a frat house:
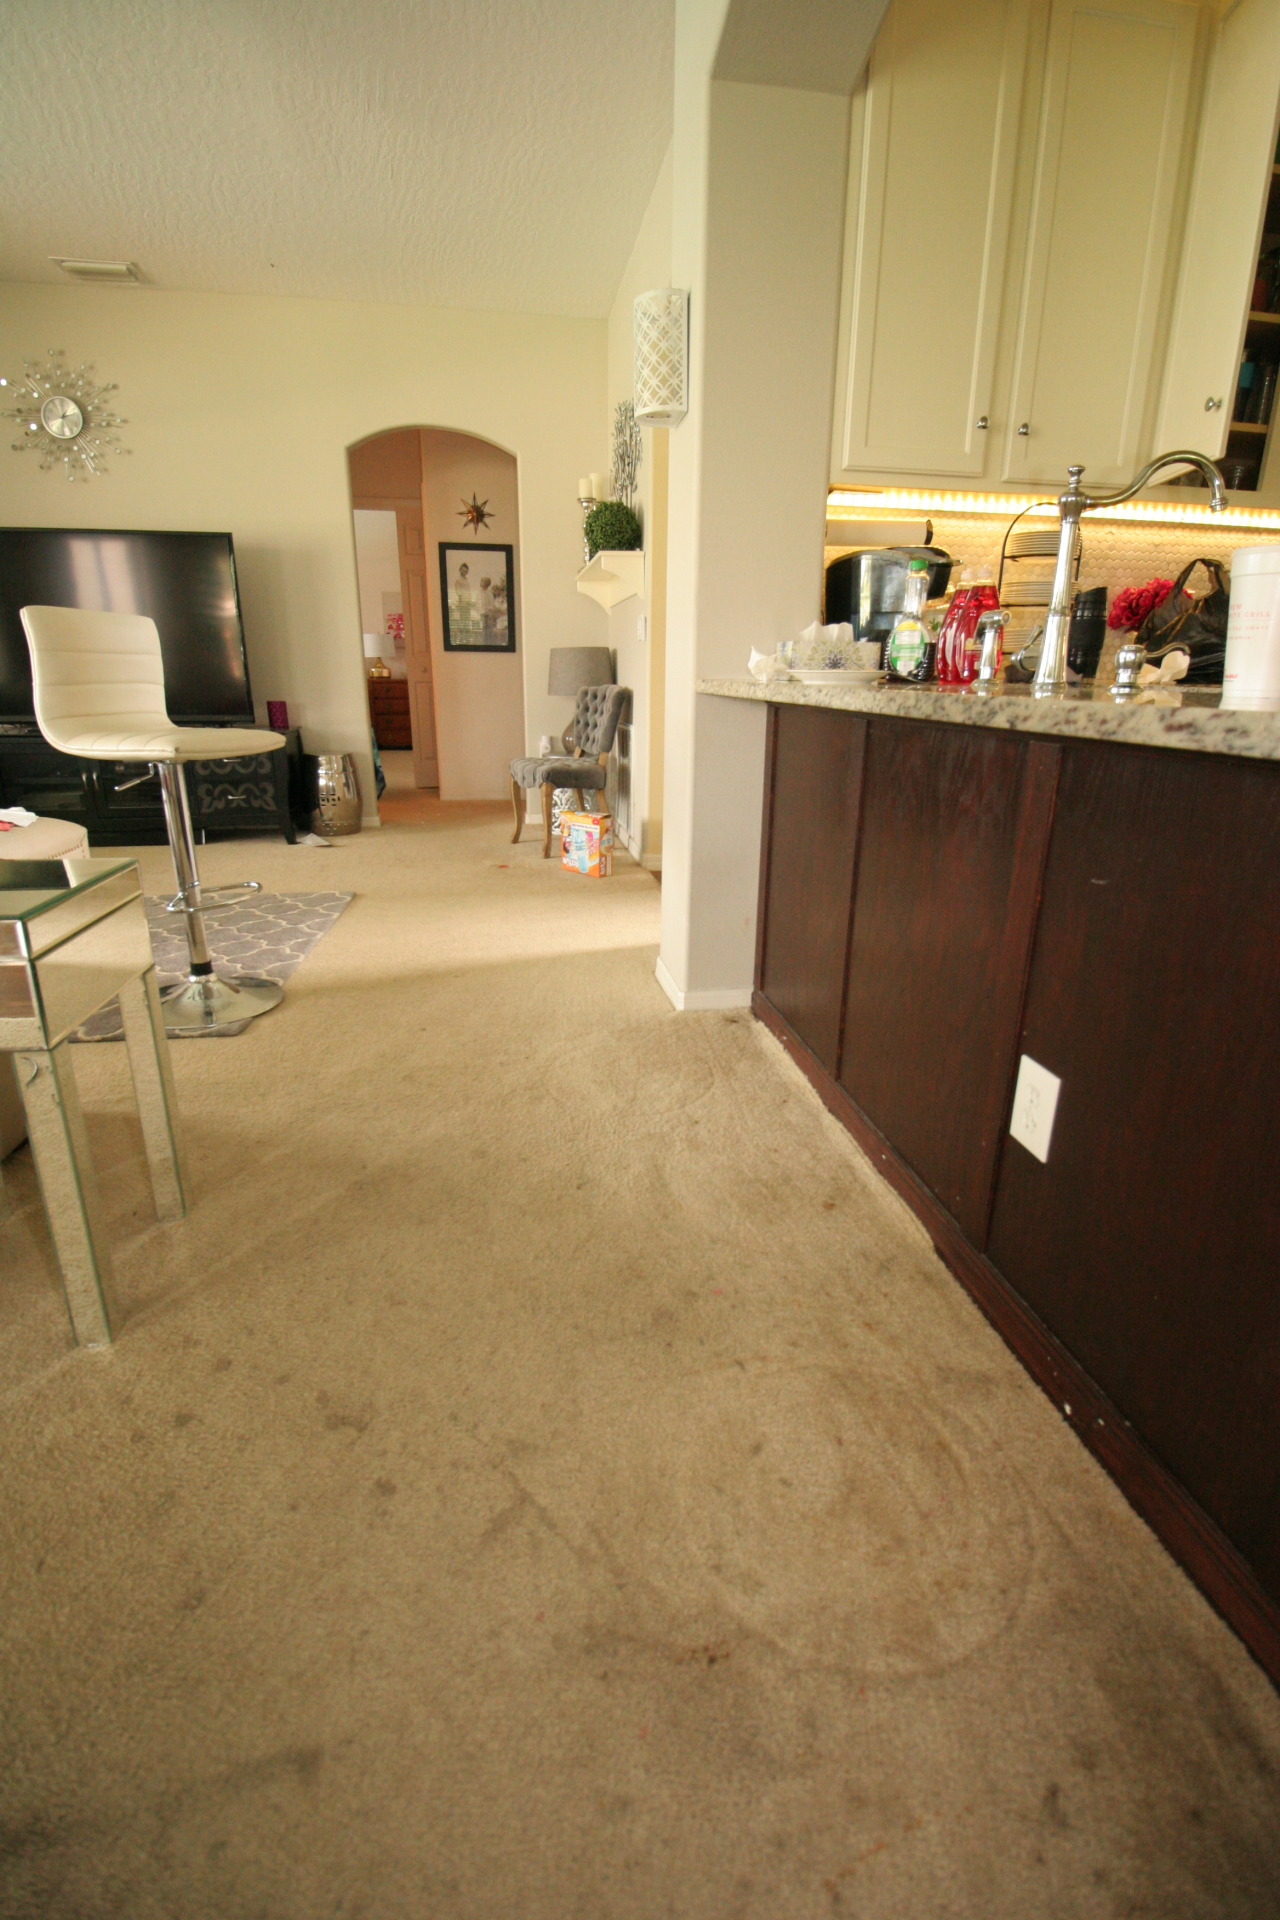
My kids can certainly take the blame for much of this, but this carpet came with the house and all the previous owners bathroom visits, dirt and skin particles too (gag). Three weeks ago when I was stranded at home during the day, the careful “peeking” at the slab got out of control and this happened:
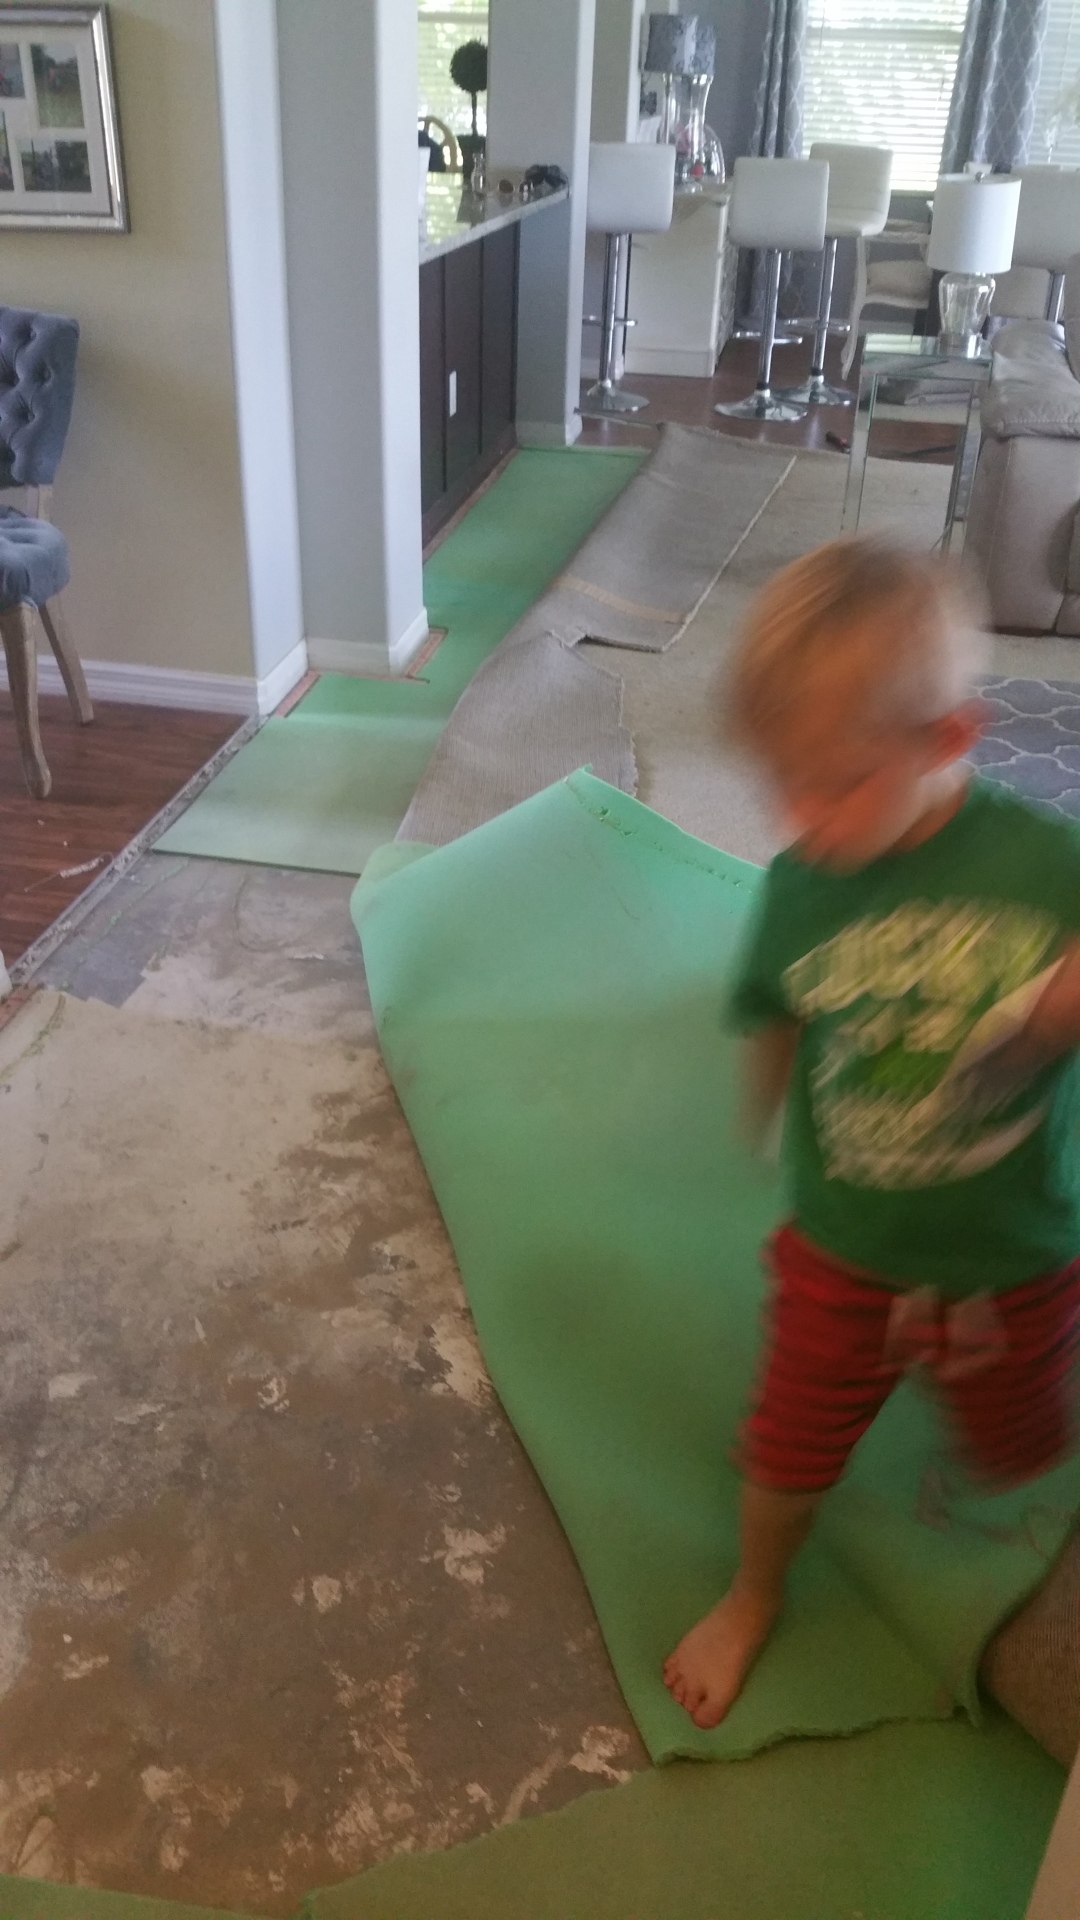
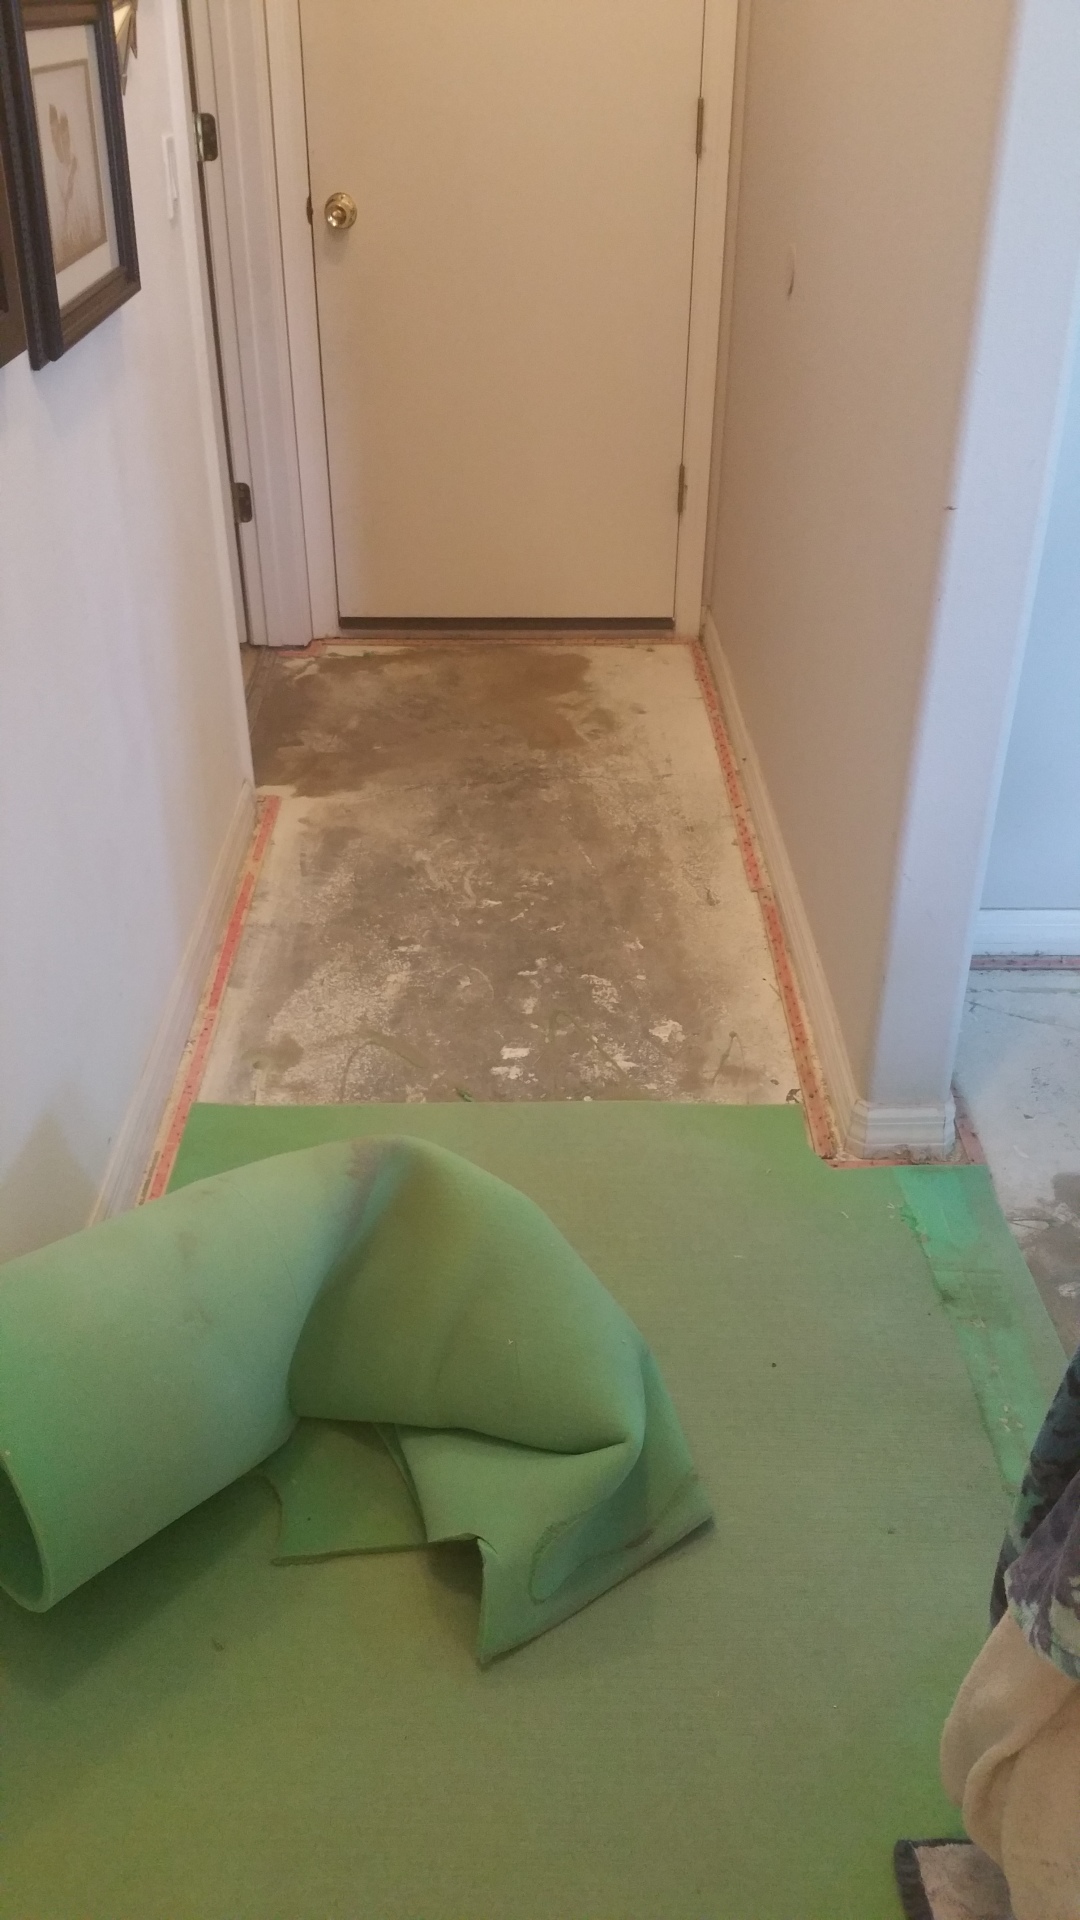
The photo above shows the door leading into the garage and laundry room.
Ok, before you do what I did, you MUST know that this could put your entire family out for possibly weeks. Your house will be covered in a thick layer of dust, and you will injure yourself daily navigating around a maze of furniture that is stacked up in every available inch of space. You will FINALLY, miraculously, get it clean enough to paint and then your husband will drip rust water on it. You will sweep it a hundred times and then your bestie will be forced to stay over with her shedding dogs in addition to your shedding dog. You will not be able to move your neck from side to side or get up without assistance for at least a week after. This project could be perhaps done in 1 week(ish) if you are diligent and do not get evacuated for a hurricane in the middle of your project (thus avoiding the rust water and dog hair scenario). If you are doing this in a bedroom and not a high-traffic area, this won’t apply to you. As much…
Here are the supplies that you will need to complete this project:
1. Seal-Krete 961001 Epoxy-Seal Low VOC Concrete & Garage Floor Paint, Gallon, Taupe: https://amzn.to/2SKSufe
2. Seal-Krete 604001 Clear-Seal Satin Concrete Protective Sealer, Gallon, Clear https://amzn.to/39OvVMa
3. DEWALT Random Orbit Sander, 5-Inch (DWE6421K): https://amzn.to/2SNPLlf
4. Laquer thinner: https://amzn.to/2T4f40W
5. Warner 5″ Heavy Duty Floor Scraper, 48″ Steel Handle, 591: https://amzn.to/2HEotaf
6. Heavy duty plastic drop cloth: https://amzn.to/2V8pEqp
7. My all time favorite paintbrush: https://amzn.to/2HDebHE
8. Metal paint tray: https://amzn.to/2PhBcUv
9. Plastic tray liners: https://amzn.to/2SS9X5o
10. Utility pry bar: https://amzn.to/2HUyKza
11. Concrete patch: https://amzn.to/2Plsdlp
12. Paint respirator: https://amzn.to/2vN6xYC
13. Extension pole roller frame: https://amzn.to/2Pc8eW8
14. BIN shellac primer: https://amzn.to/2HJqja
15. 3/8″ roller covers: https://amzn.to/2v4OAo9
16. Ear protection: https://amzn.to/2STtwdk
Once you have removed your carpet and dragged it out to the street, garage, dump, you will find that there is lots of sand and dirt underneath. I chose to sweep this up immediately because I did not want said dirt to be dragged through the rest of the house. After the first sweeping, it’s time to remove the carpet tack strips that are all along the perimeter of the room. I did this by using the hammer to tap the pry bar under the tack strips where the nails were and then gently pulling up with the pry bar. You may want to wear ear protection for this because the metal banging together is beyond LOUD! Most of the nails came right up still in the wood strips. Don’t be concerned when the nails pull up large chunks of concrete with them. You will patch these holes later. Use the back of the hammer to pry up nails that don’t pop up with the tack strips.
For the most stubborn nails, this is where I used the 2 hammers. The first hammer I would line up with the nail on the pry side of the hammer. Then I would use the second hammer to “bang” the pry side into the nail to get a grip on it. Once the nail was secure in between the 2 pry bars on the backside of the hammer, I was able to just lift them out. This was necessary on about half a dozen nails where the head was small or broken.
After you have removed all of your tack strips and nails, it’s time to remove all the carpet glue that is on your floor. The easiest way is to pour lacquer thinner directly on to the glue and then cover it up with plastic for about 5 minutes to let it dissolve the glue before the thinner evaporates. Once it soaks for a few minutes, it peels away from the floor with the scraper like butter. I would not suggest trying to do this without the thinner. My floor had thick spots of paint overspray, mortar and other glue-like materials along the baseboards and even in the middle of the floor from the builders not caring about what they slopped or spilled on the concrete. Lacquer thinner worked like a charm on these areas too. You do not have to remove all the paint, just the super thick, uneven parts that would be noticeable after painting. Make sure you dispose of the glue and thick paint goo into the trash. Don’t let the goo stay on your floor or else it will re-stick when your thinner evaporates. If you have stubborn areas of glue, you may want to sand those places with your sander.
After all the glue spots are removed, it’s time to patch the holes and cracks in the concrete. You will want to vacuum before patching to remove the large loose chunks of debris so that it doesn’t get stuck in your patching compound and make a mess. You patch these holes exactly the same as you would a wall. Fill the holes and try to remove as much of the excess as possible. I also patched all the cracks in the concrete that ran through the middle of the room. My room was 320 square feet and used a whole tub of patching compound. Once the holes and cracks are patched, it must dry for 24 hours before sanding or getting wet.
Once it has dried, take your sanding apparatus and smooth it all down. Try not to sand the bare concrete if you are using an electric sander because if you do you may accidentally “polish” it and your paint wont stick to polished concrete. You may chose to use an etching product after you sand it all down to give your paint something to grab. I chose to forgo this step because it is necessary to rinse your floor after using it and I did not want to do this since the floor is indoors and has no drain. Note: sanding makes a super mess and your house will be a dust-bowl after this step. After I sanded my floor with no mask and children and dogs running around, I learned that silica (a material that becomes airborne when sanding concrete) is harmful to your lungs and health. Please learn from me and wear a respirator to avoid breathing this nasty stuff in.
After you are finished sanding your floor, it’s time to clean it to get it ready for paint. I used the shop-vac at least 5 times and then I used a regular broom to sweep it twice and then a shop-vac again. It is very hard to get it totally clean, so just do the best that you can. After you sweep away all of the dust you will want to mop it. I used a regular mop head and a bucket of plain water and mopped it twice. I did not use a cleaning product because I did not want to run the risk of it interfering with my paint or needing to be rinsed with water afterwards. But of course, the choice is yours. After you get your concrete wet with water or any other liquid you must let it dry again for 24 hours to be sure it is really dry before you paint it.
If you are like me, have a dog, and actually live in your home and move around in it, your floor will manage to accumulate dog hair and fuzz on your floors AGAIN during the 24 hour period while you are letting it completely dry after cleaning it. Let yourself off the hook and pick out any dog hairs or people hairs that you see as you are painting. This is unfortunately unavoidable so don’t let anyone let you believe otherwise. I chose to use a pan for my paint instead of pouring it directly on the floor because it’s a large space and I wanted to control the amount of paint I was using and not waste any. It took almost 2 gallons to cover my floor.
I let my paint dry for about 2 days before putting on the top coat. The can said to wait for 3 days, but I didn’t listen because I was so sick of having my house torn up. I did two coats of the clear sealer (about 8 hours apart). The sealer is very thin and milky looking. I applied it with one hand on the roller so that I was using light, even pressure on my roller to produce light even coats. It feels completely dry after a few hours, but I did listen to the can this time and let the whole thing dry for 3 days before putting my furniture back on it. Here is what it looks like after 2 coats of paint and 2 coats of sealer:
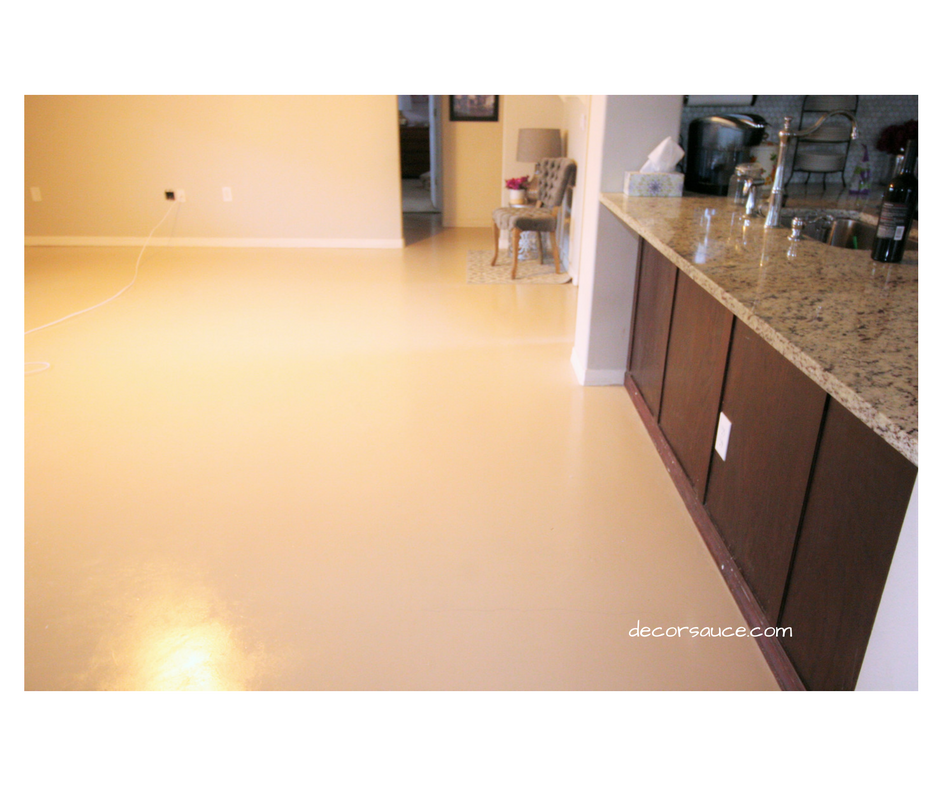


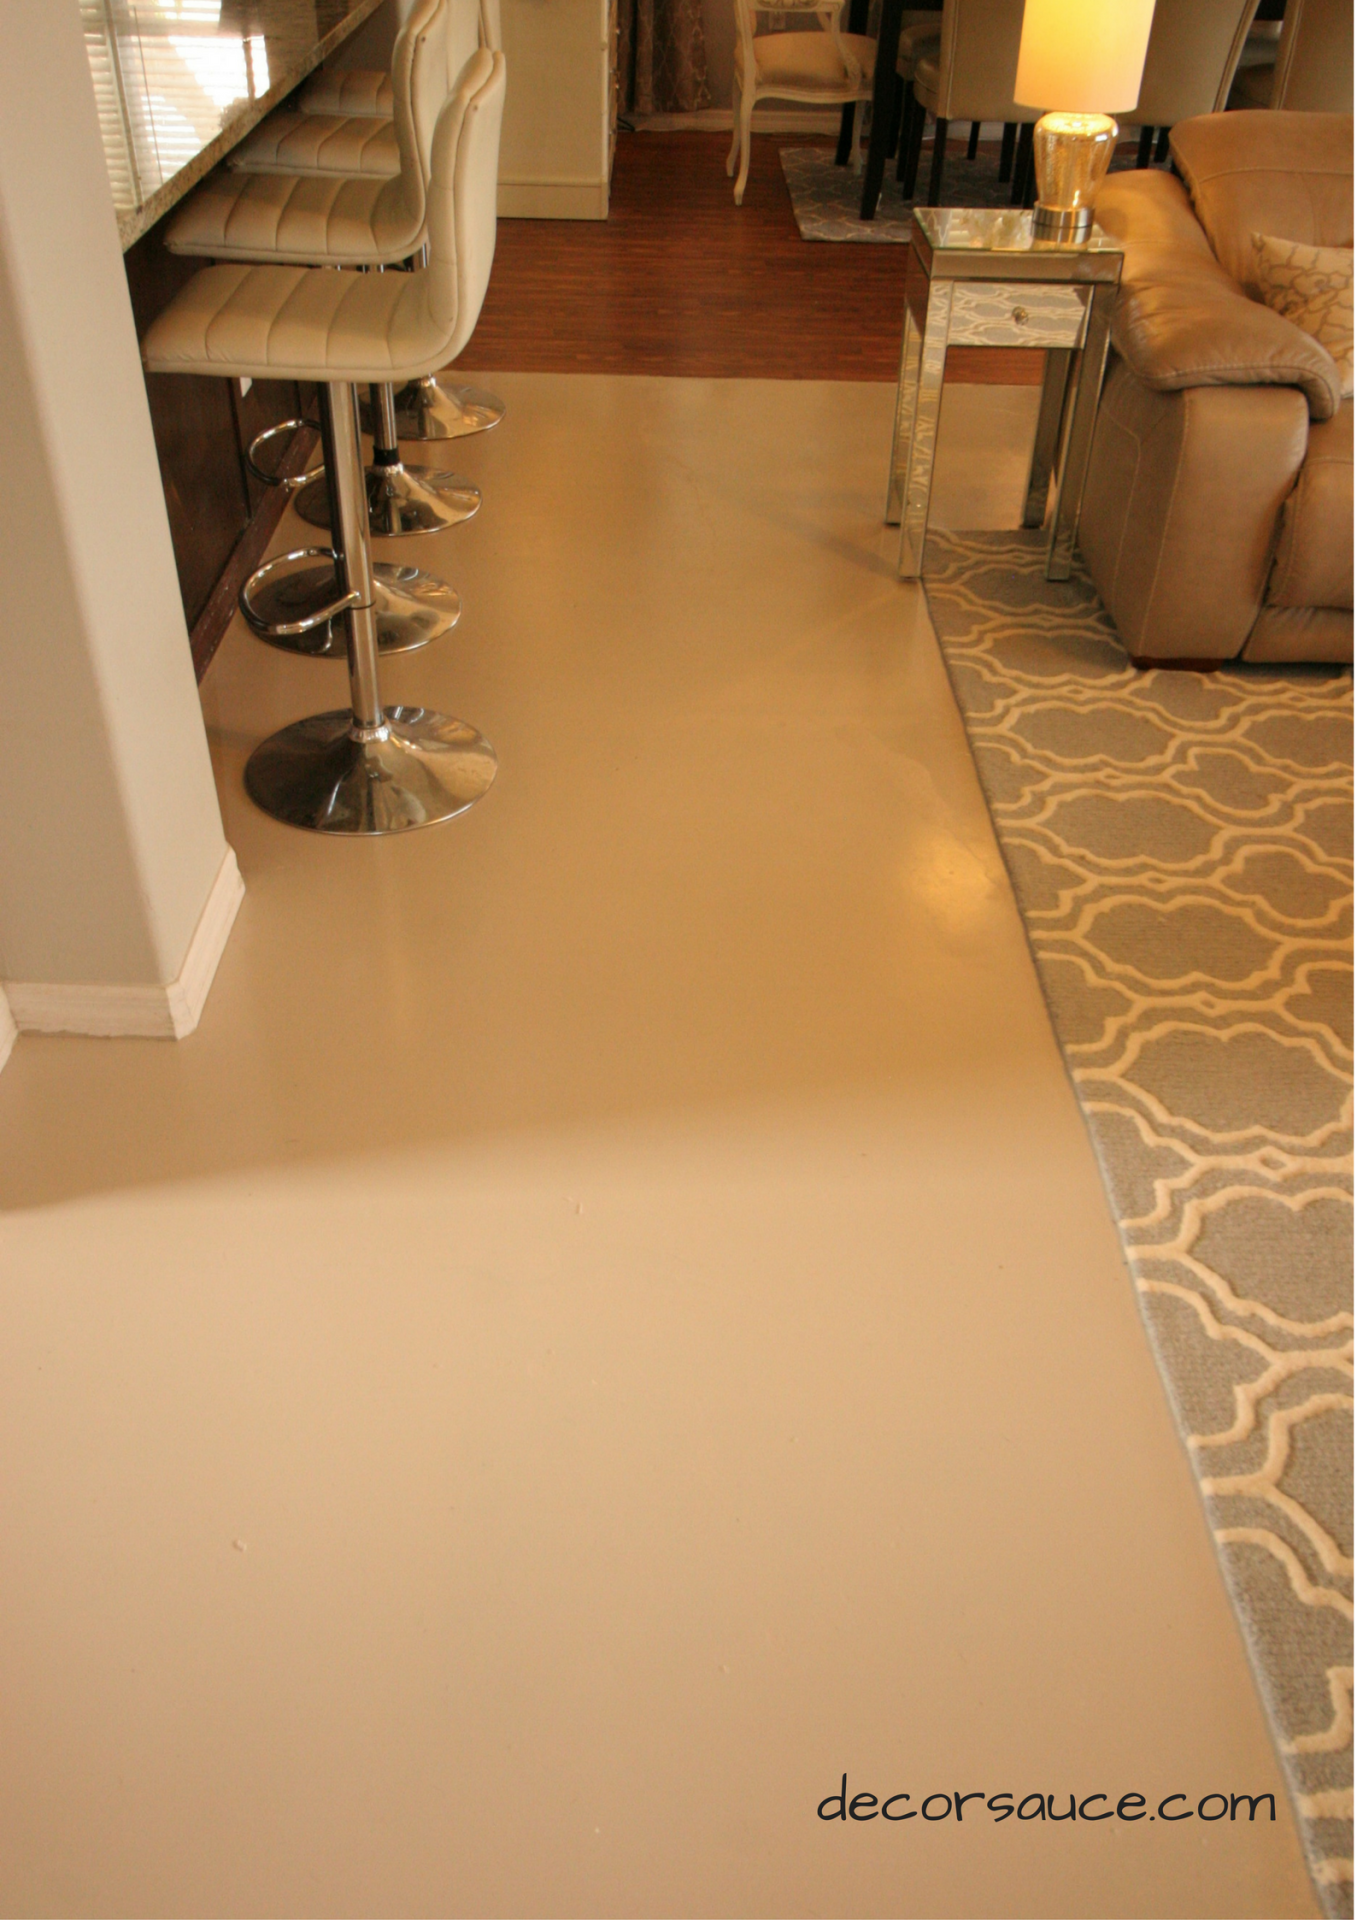
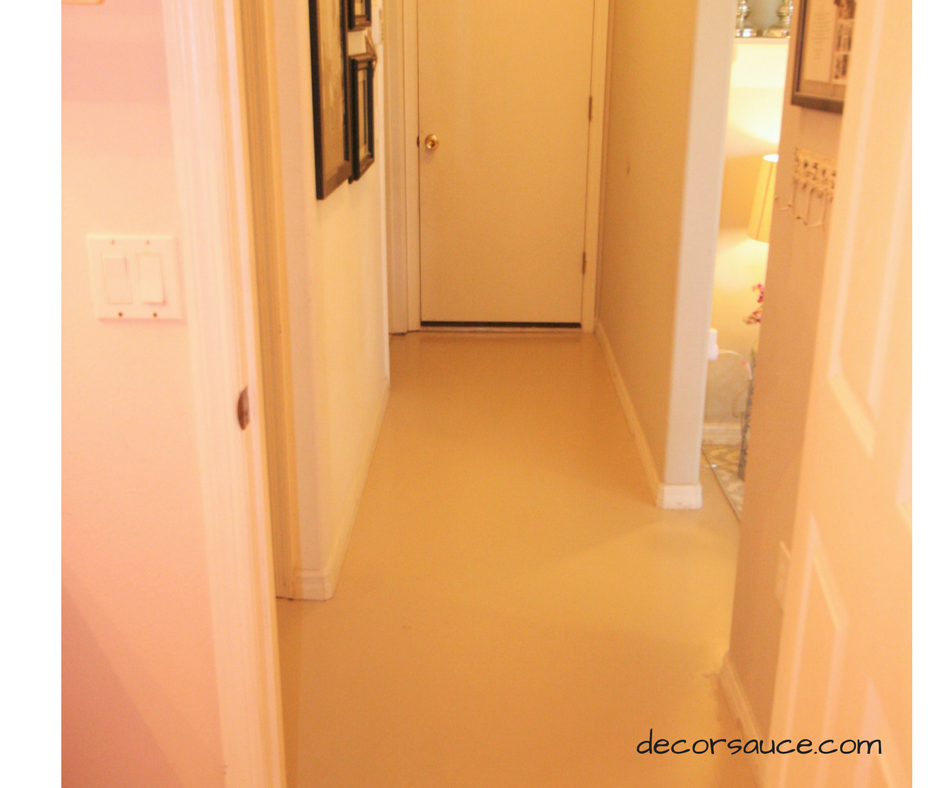
Keep in mind that even though you can put furniture back on it after 3 days, it takes a full 30 to cure, so tread lightly until then so that you don’t mess up all your hard work.
I am super happy with the way it turned out! I love the look and the ability to actually keep it clean for real. My hope is that it will wear well over time, and I’ll definitely keep you posted!
At the top of this post is a link to the video tutorial of this project if you would like to check it out. Please subscribe and hit the notification bell on my Youtube channel to be kept up to date on my latest projects, and be sure to “like” or share this post on Facebook if it inspired you. Thanks for visiting!

Leave a Reply