Let me just start by saying that this was by far the worst project I’ve ever decided to do myself. It’s hard. It’s dirty. You are up all night sweating with a stomach ache. Your Mom’s staring at you like you’ve dragged her to the BMV on a Saturday. You will ruin things like your 3 day old under-mount sink.
This project is like childbirth in that it is an incredibly painful hot mess when you are in the throws of it, but afterwards when you’re gazing at what you’ve made, you forget all about the pain. Mostly.
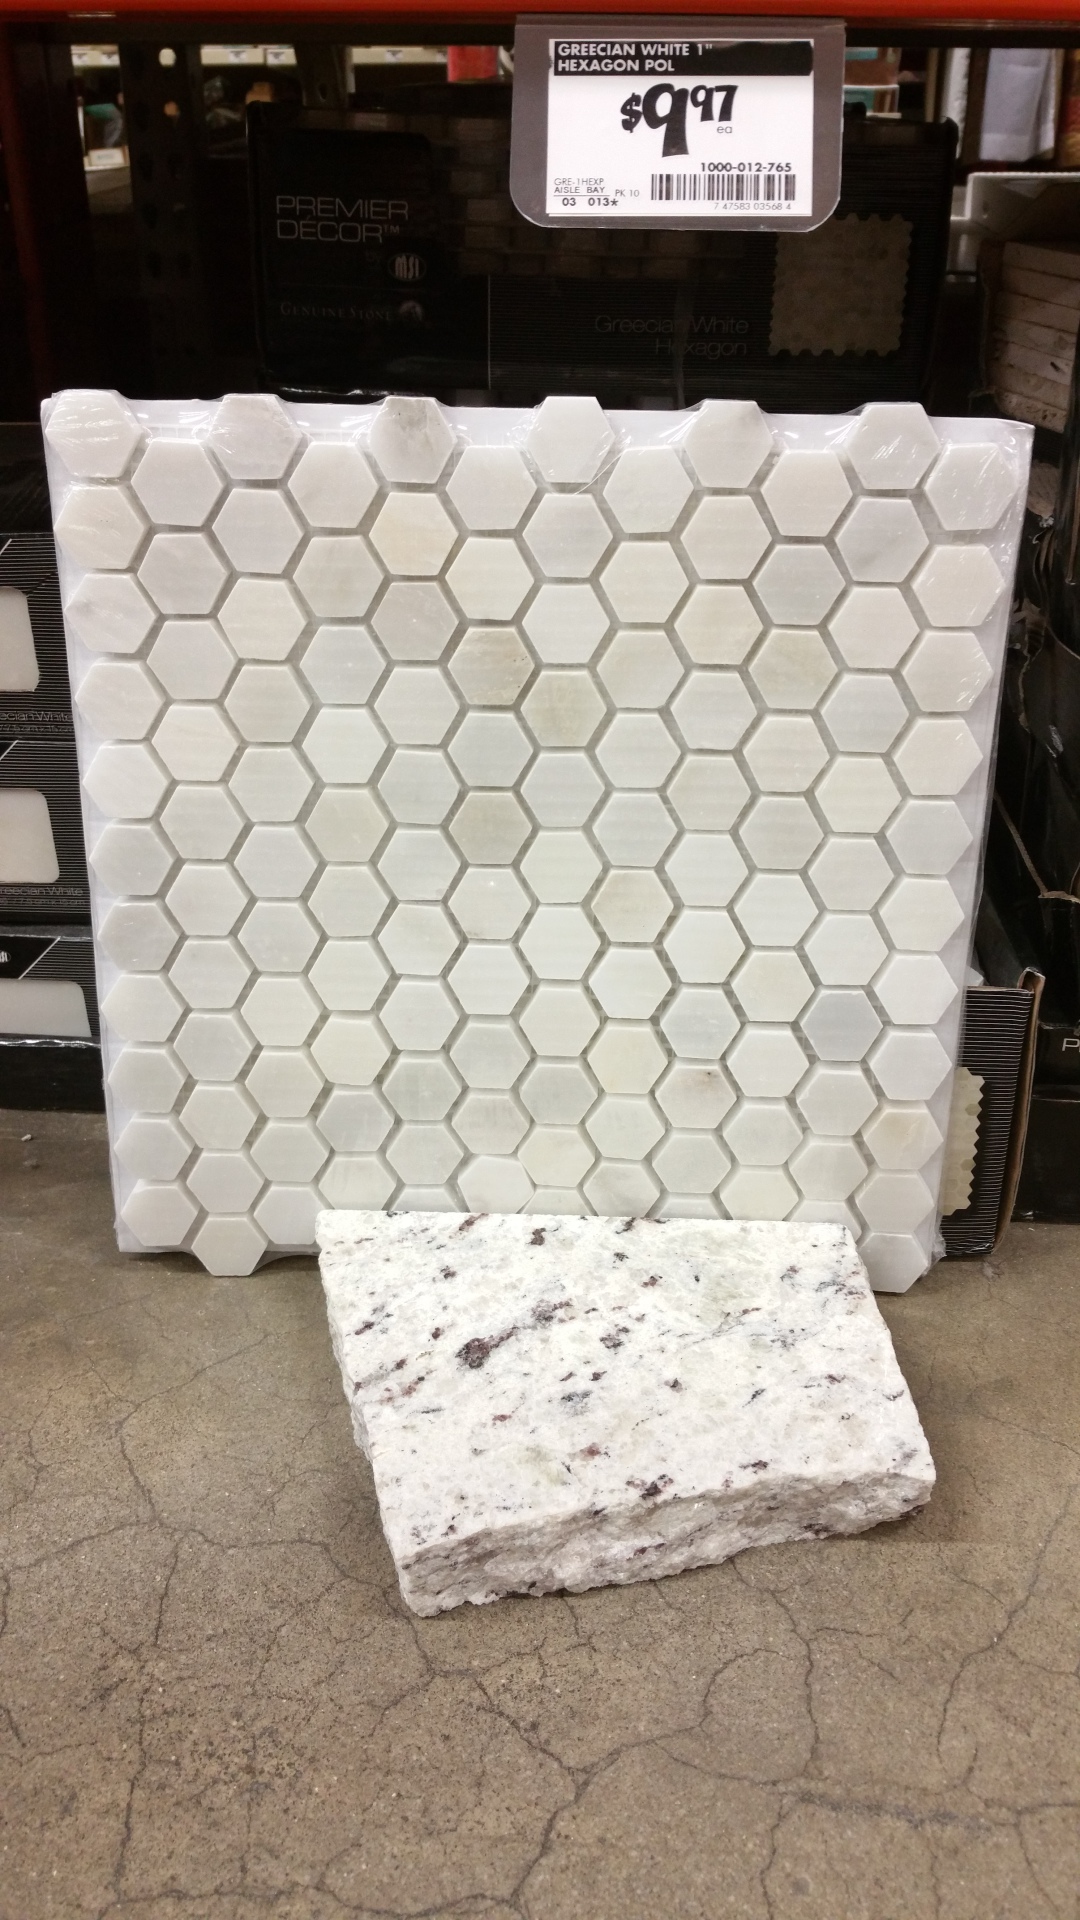
When I saw this tile and brought it home I could not contain my excitement. It was GORG! It twinkled like a thousand tiny stars when I held it up to my wall. Being a gal all about the bling, it was a no-brainer. I was in LOVE! Then my husband saw it. He said it didn’t “match” my new granite (What?! You don’t think it fabulous too!?) And my Mom, who’s eye I trust implicitly, looked at it with the disdain of a mother who’s just gotten the news that her daughter is eloping in Vegas with a convict. So I sat and stared at it for a few more days, stewing about my choice and frantically googling pictures of it for reassurance. In the end, I went with my gut and when I step back and look at my tile I am totally taken by it. I love it. It’s my favorite thing about my kitchen. It glitters like sequins on a gown. I’m a smitten kitten. Even Mom agrees now. Here it is in the store:
I saved around a thousand dollars doing this gorgeous project myself. And that my friends, is what makes this project WORTH IT!
Here is what you will need for your tile project:
- Enough tile to cover your backsplash. You calculate square footage by multiplying length X width of your space. Then, you divide by 12 if you are using 12″ square tiles like I did. That means if your length is 20′ and your width is 10′ (20 X 10=200/12=16.6) you need 17 pieces of tile. It never hurts to buy extra, you can always return it if you don’t use it. My tile came from The Home Depot and it was $10 per square foot.
- Thinset. This is what you spread on your wall under the tile to make the tile adhere to the wall. Thinset comes in powder form or already mixed form. I used the powder and mixed it myself because it was about half the price for about 2-3 times more.
- Two 5 gallon buckets for mixing your thinset and grout
- A mixing paddle for your drill. This is optional but I don’t know how you’d be able to mix this stuff without it.
- A square notch trowel for spreading thinset
- Grout. Sanded for solid tile such as glass or porcelain. Unsanded for soft and porous tile like marble.
- A grout float for applying grout
- Small rubber tile spacers
- lots of rags, disposable gloves, and a respirator mask
- 2 large yellow hardware store sponges for wiping off your grout residue
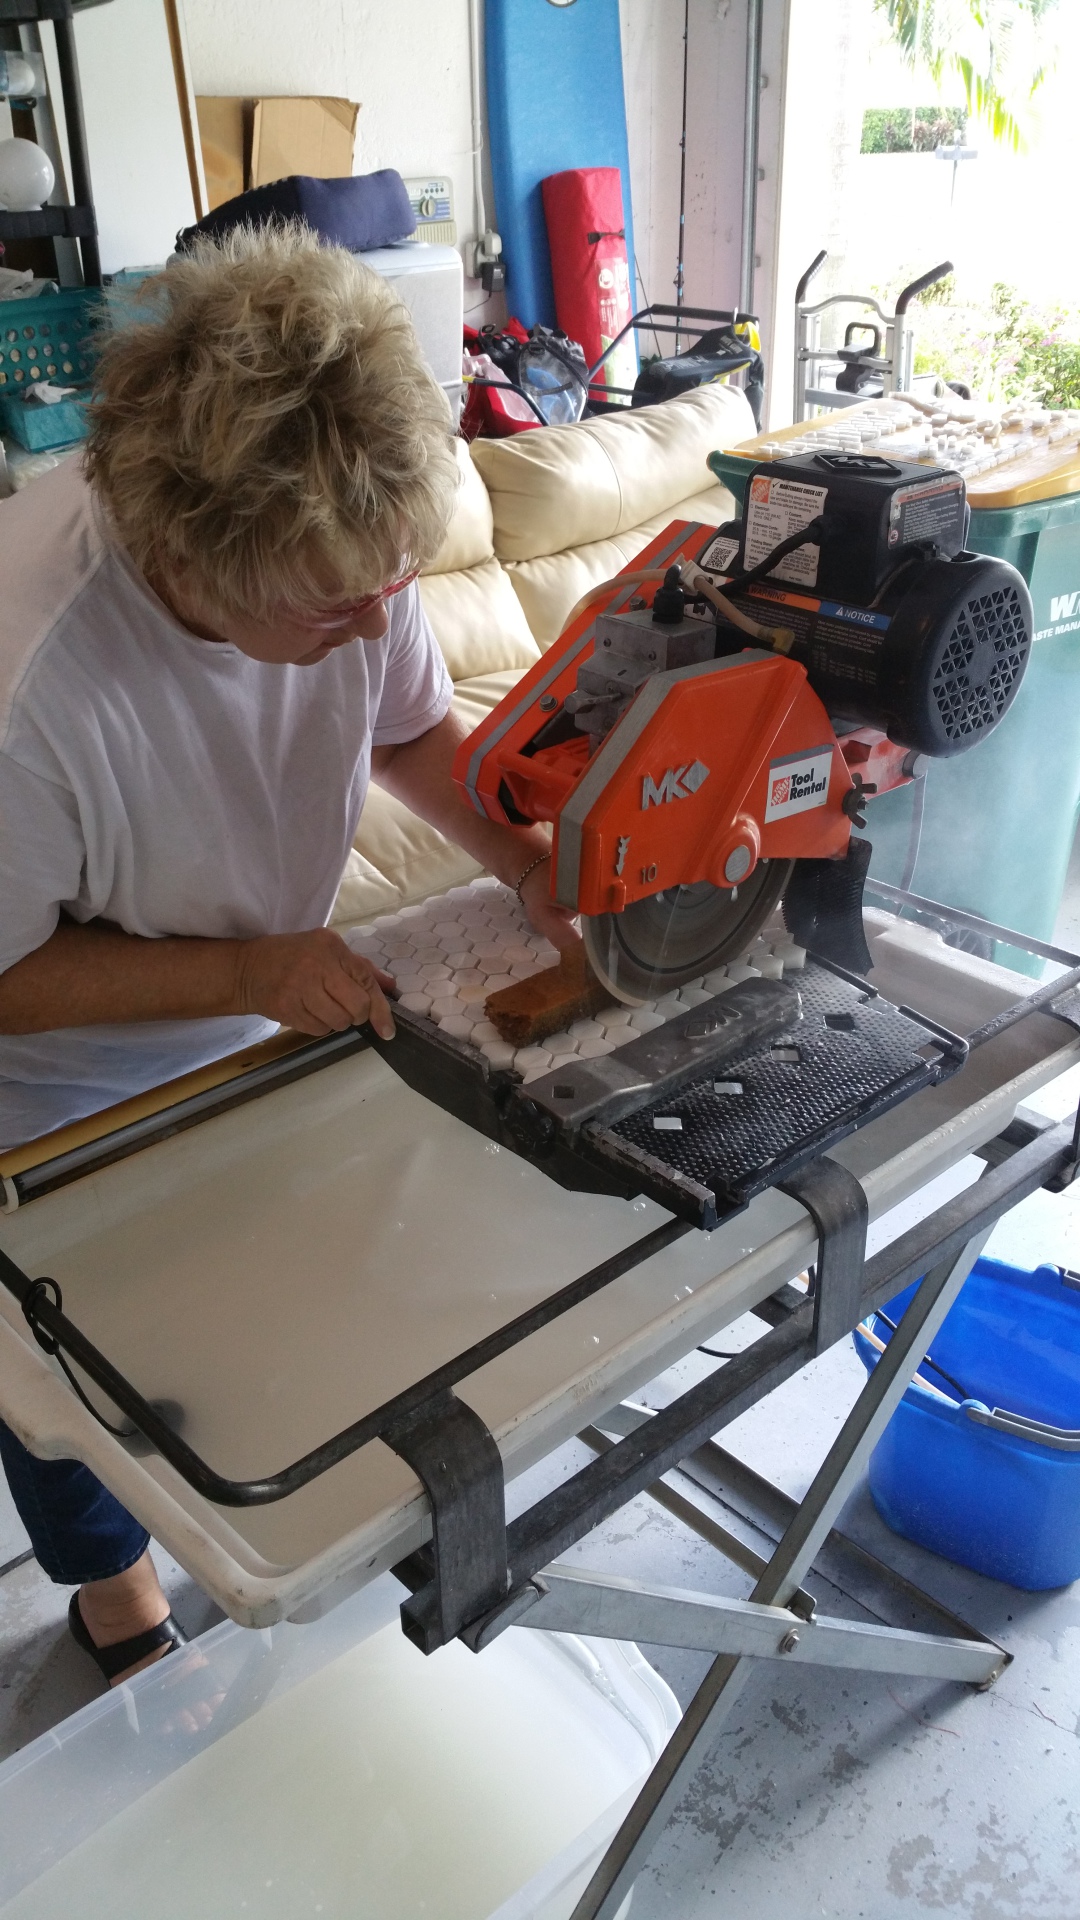
- A wet saw with a diamond blade (if you are cutting a soft natural stone like marble). You can rent this at The Home Depot.
- Edge pieces for where your tile will stop (see second image below). I used a stainless steel edge and I needed 3 “ends” to stretch between the upper cabinets and the countertop. I cut this myself with a jig saw, but the hardware store guys can be sweet talked into doing it for you for free.
- A good friend or a family member that will speak to you again after coercing talking them in to helping you with this project (thanks again for forgiving me, Mom.)
Ok, the first thing you need to do is make sure that your wall is ready to accept your tile. You do this by patching any damaged areas and making sure the surface is nice and even. Variations in your wall could make your tile pop out in places which will stand out later in a weird way. Remove your outlet faceplates and turn off the power to those outlets so you don’t accidentally electrocute yourself, or else you will never have beautiful tile. Then tape them up so you don’t get schmutz inside.
Next you need to dry fit your tile. This means you need hold it all up and then lay it all out, in order, exactly how it will go on the wall and then cut and piece where needed in advance. If you are using the 12″ sheets like I was it is crucial that you make sure you measure carefully and accurately because it will majorly screw you up if you’re off. I made an error when calculating mine which did not show itself until the last quarter of the project. Suffice it to say that it took a couple of extra hours of sheer panic trying to figure out how to fix it, and in the end, it’s not perfect. It’s like a giant puzzle that you cement to the wall. You cannot remove 15 puzzle pieces and start over. Here is how I laid them out:
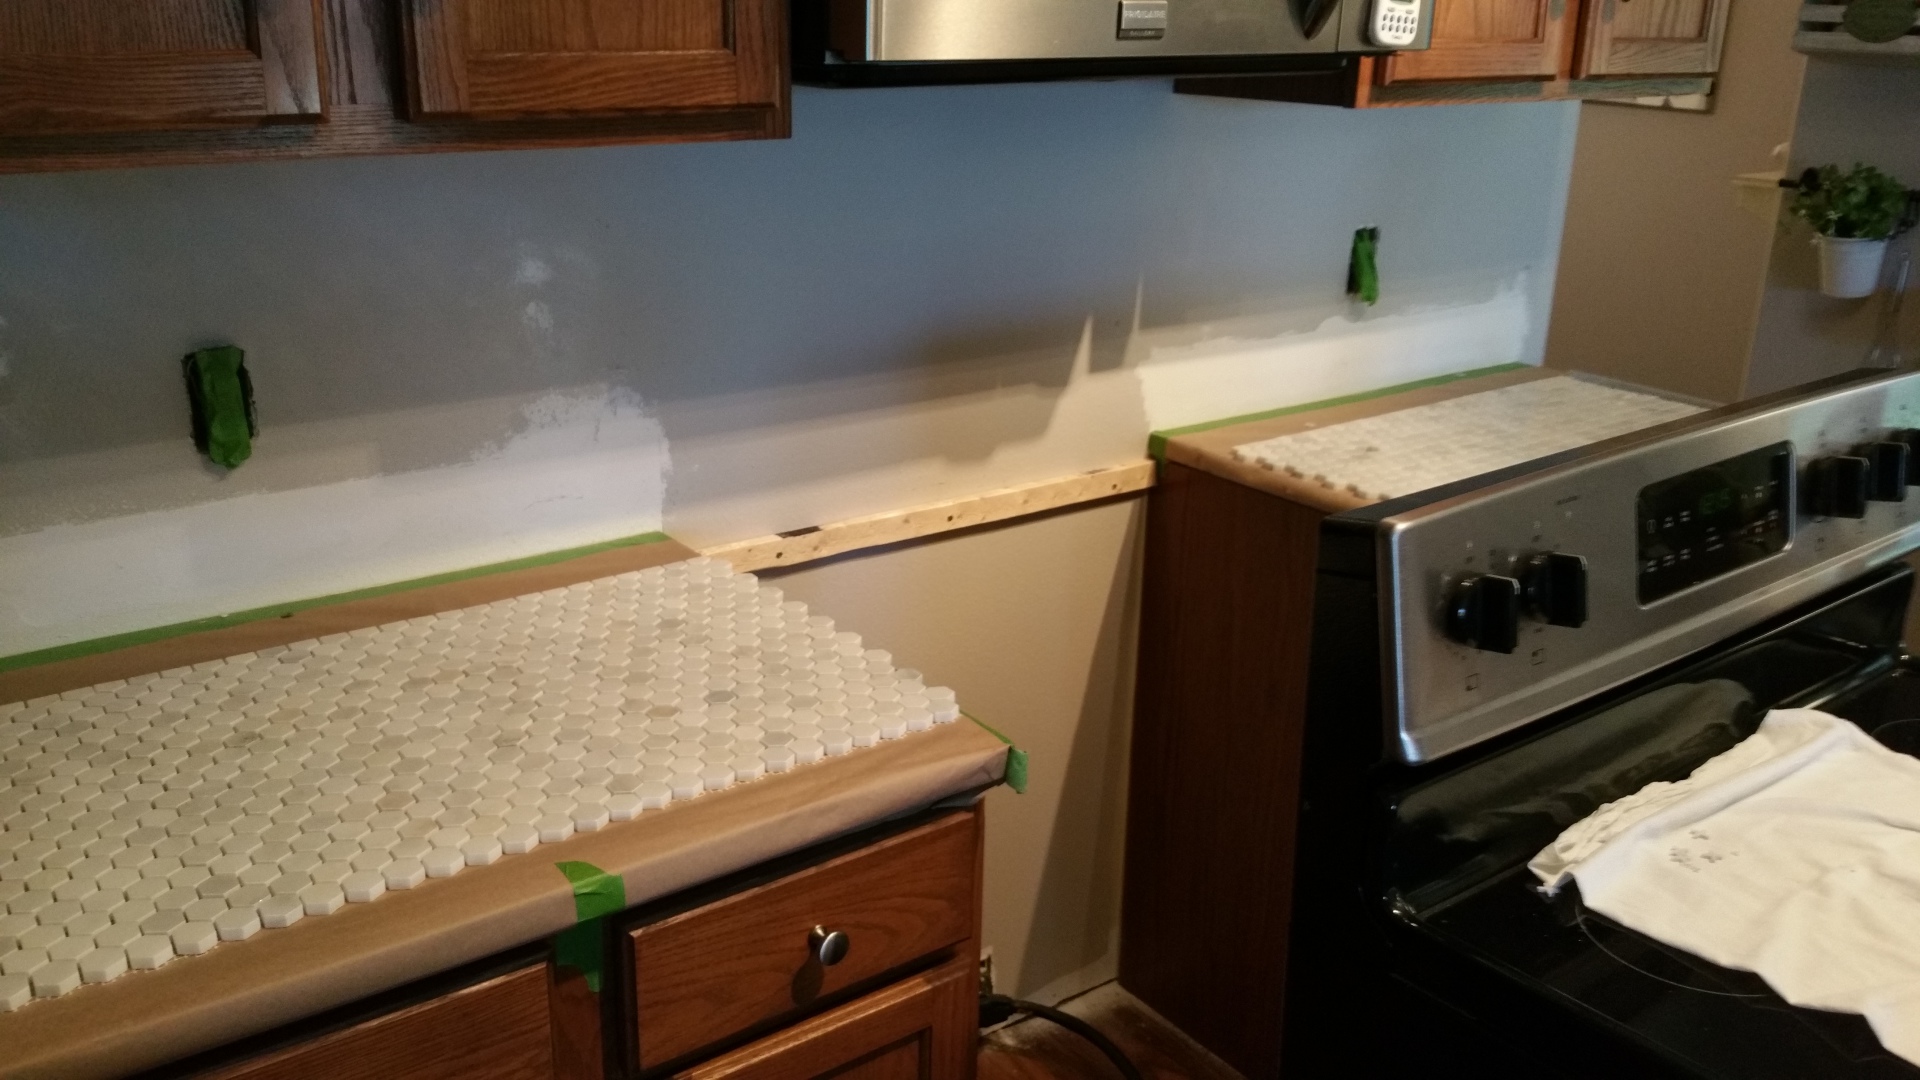
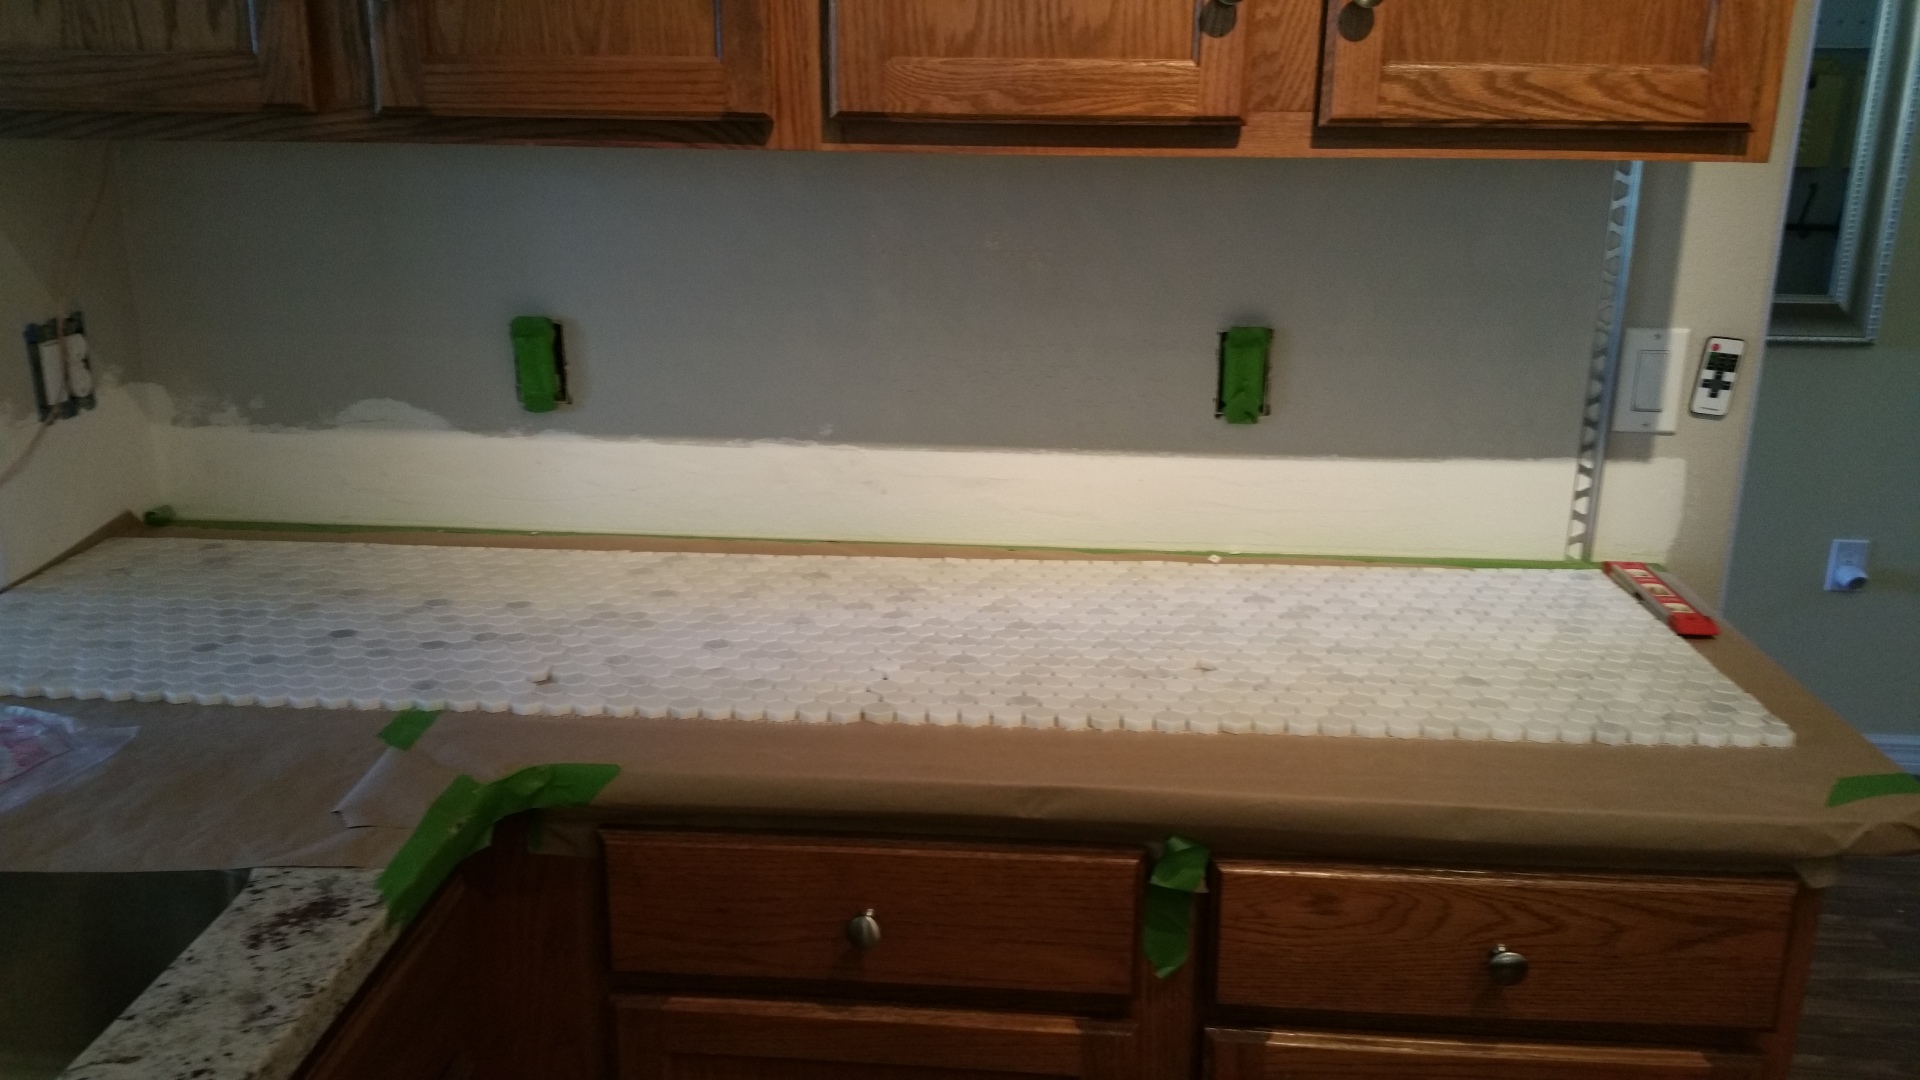
Now, MOVE THEM OUT OF YOUR WAY. You don’t want to slop thinset all over them while you’re working. Don’t be me. Also, tape down kraft paper or some other drop cloth so you don’t ruin your countertops.
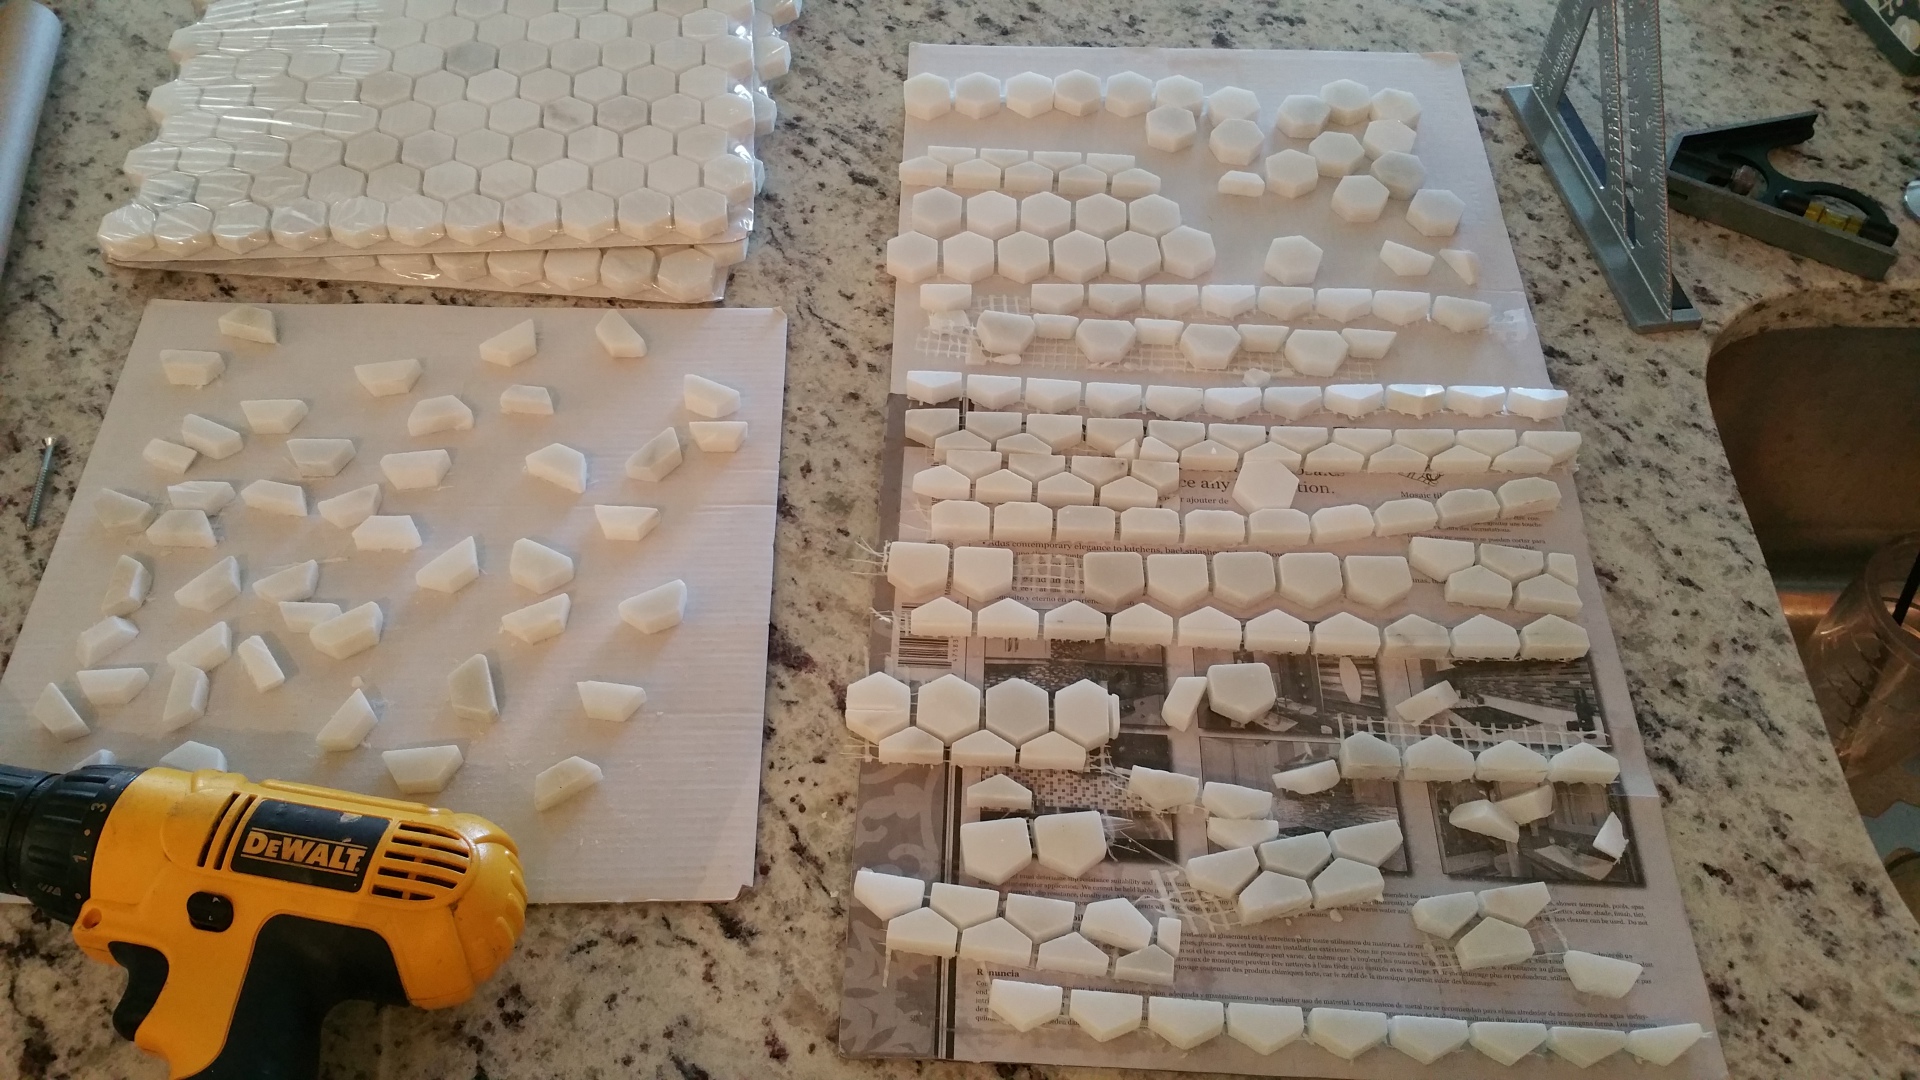
As I mentioned above, I had to rent a wet saw with a diamond blade to cut my tile. This was the most intimidating part of the project for me. Luckily, Mom was comfortable operating the scary power tool while I hid and ate chicken biscuit sandwiches. Even though this tile comes in sheets you cannot escape the cutting. We “burned” a whole sheet practice cutting. Also, you will need a selection of tiles that are cut to 1/4 of a tile, 1/2 of a tile, 3/4 of a tile, and in my case, tiles that were cut down the middle both vertically and horizontally. You will use these pieces to fill in where you don’t need a full tile, such as around your edges and your outlets. Here is an image of our cut tiles. You leave them on the net and cut in rows, then pull them off to piece them:
Don’t worry, she kept all of her fingers. After you’ve dry fit and practiced cutting, it’s time to mix your thinset and get ready to start your installation. We only mixed up a little bit at a time because it dries fairly quickly and becomes harder to thinly spread.
Here is me mixing the thinset (or grout, they look the same). Don’t judge our looks, we were tiling for two days straight:
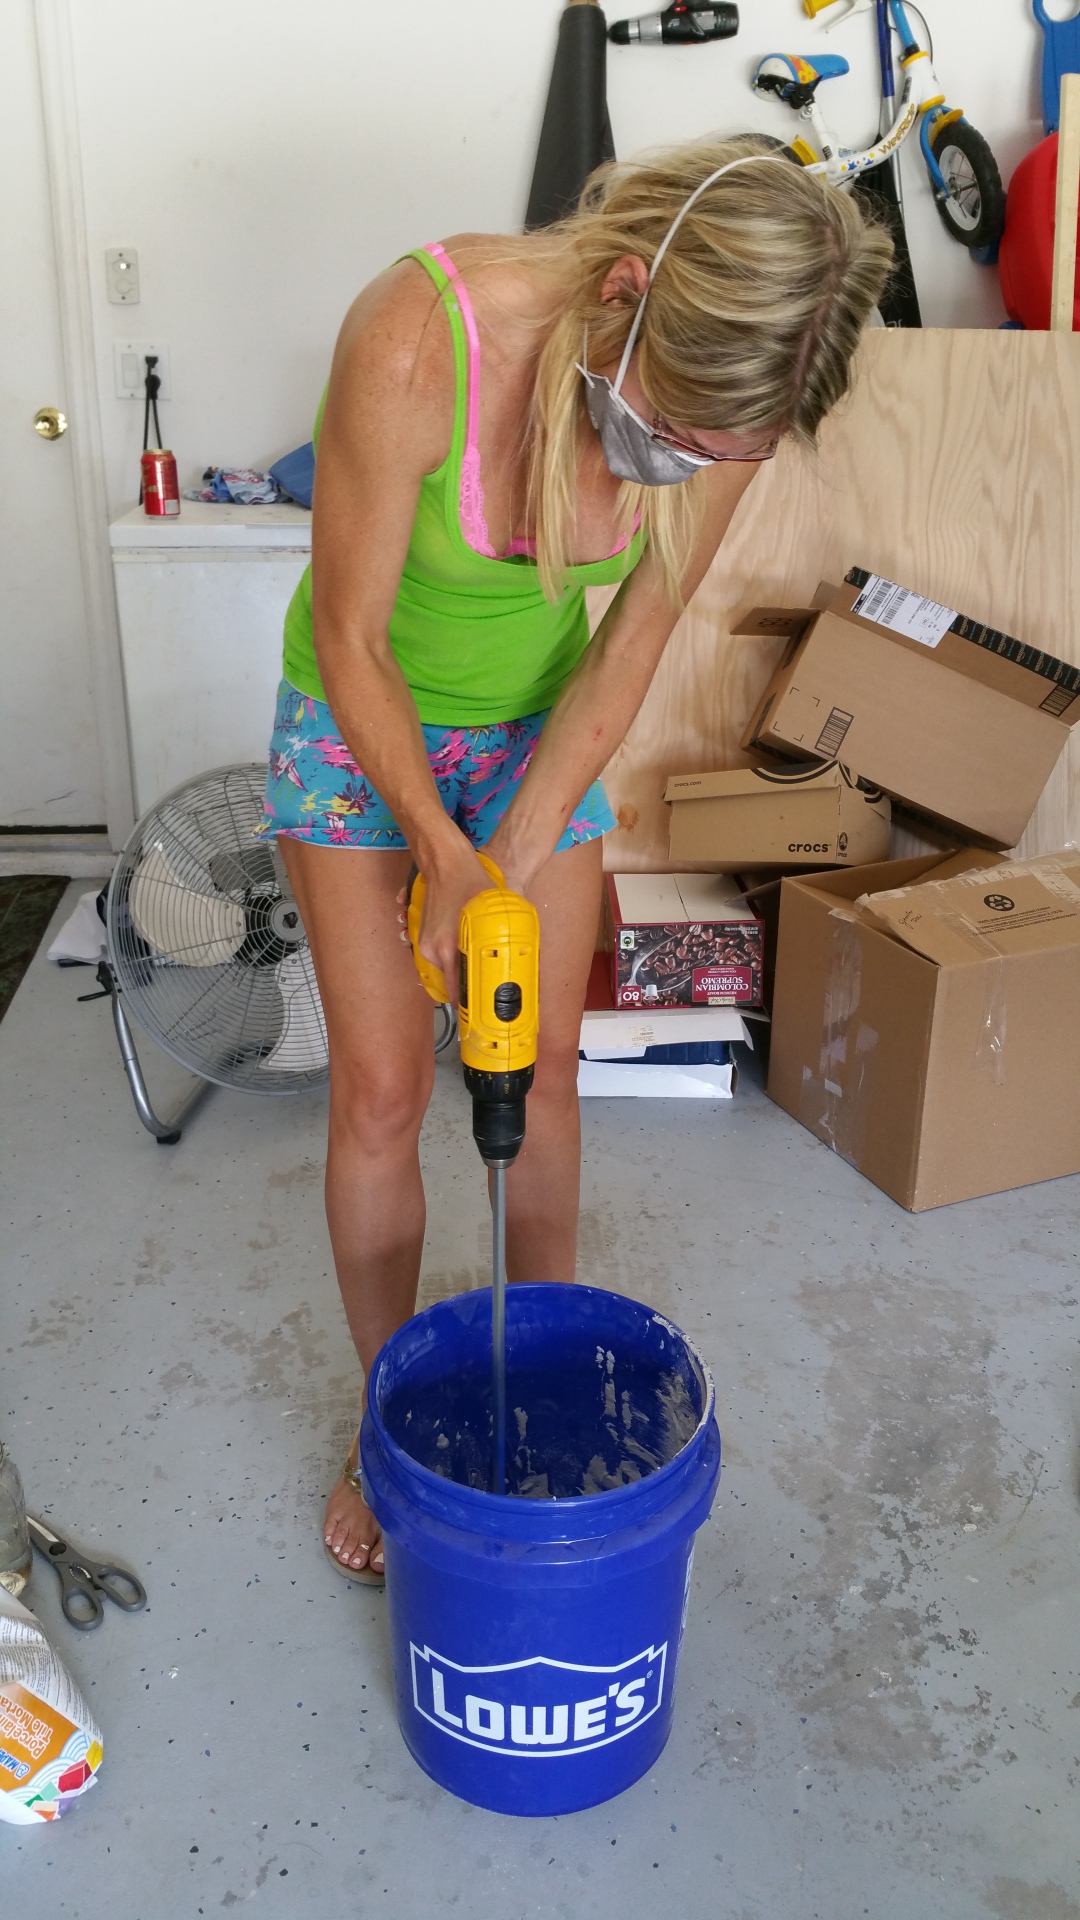
I wore a respirator mask because its powder and I didn’t want to be eating it, and you shouldn’t be eating it either. As far as the mixing, there is really no recipe. You dump a little powder, then you dump a little water on it. Keep dumping powder and water until you get the consistency of peanut butter. You will get to know the texture you like best once you get going on the spreading.
Once the thinset has been mixed and allowed to sit for a couple of minutes you are ready to spread it on your wall. Start in about 2-2 1/2 foot sections. Use your new square notch trowel for this. You want it to be thick enough for your tile to stick, but not so thick that it squishes up between your tiles. If it is squishing up through your tiles, it’s too thick and you will have to scrape it out of the cracks and off of the surface of your tiles later. Scraping is tedious and annoying and you don’t want to do have to do it.
After you’ve spread your thinset on the section you are working with, you will press your tiles in using your new grout float. Really press them in, don’t hold back. This will insure that your tiles will have a uniform appearance and texture if you run your hand or dish cloth over your tiles. You will also probably need to use spacers to make sure that your sheets have uniform spacing between them, Just make sure that they don’t slip behind your tiles and get set into the thinset. Learn from those who went before you.
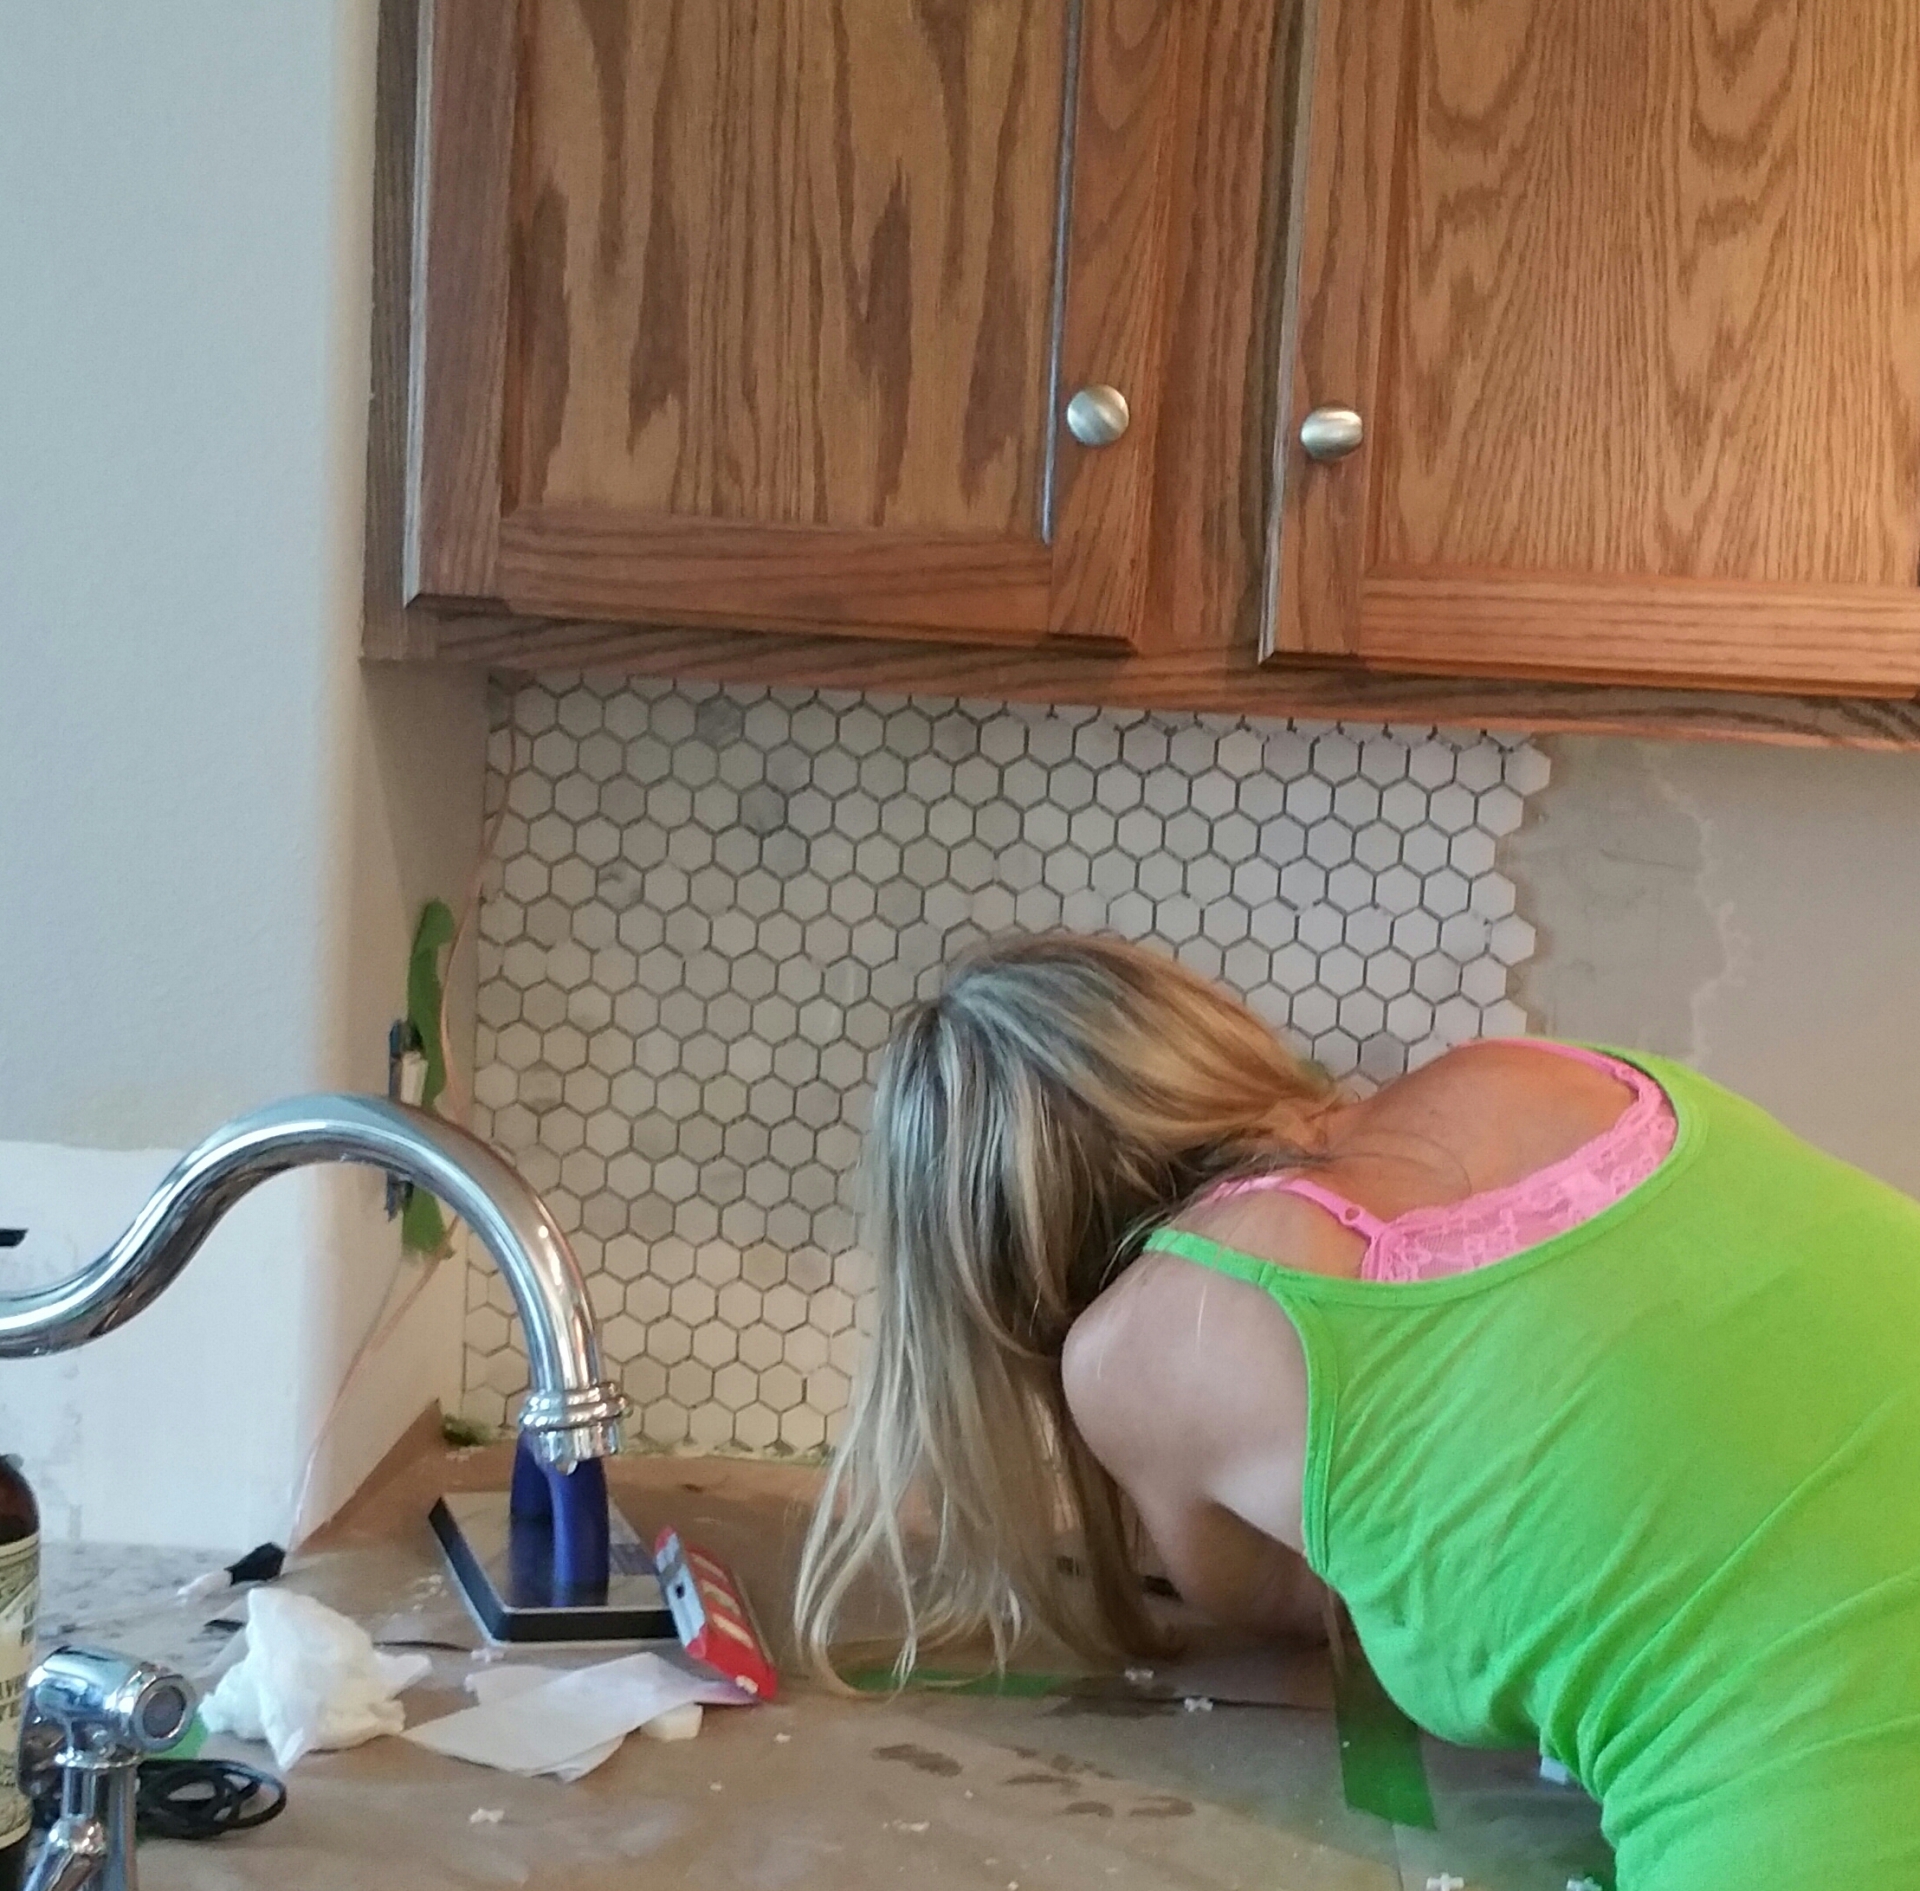
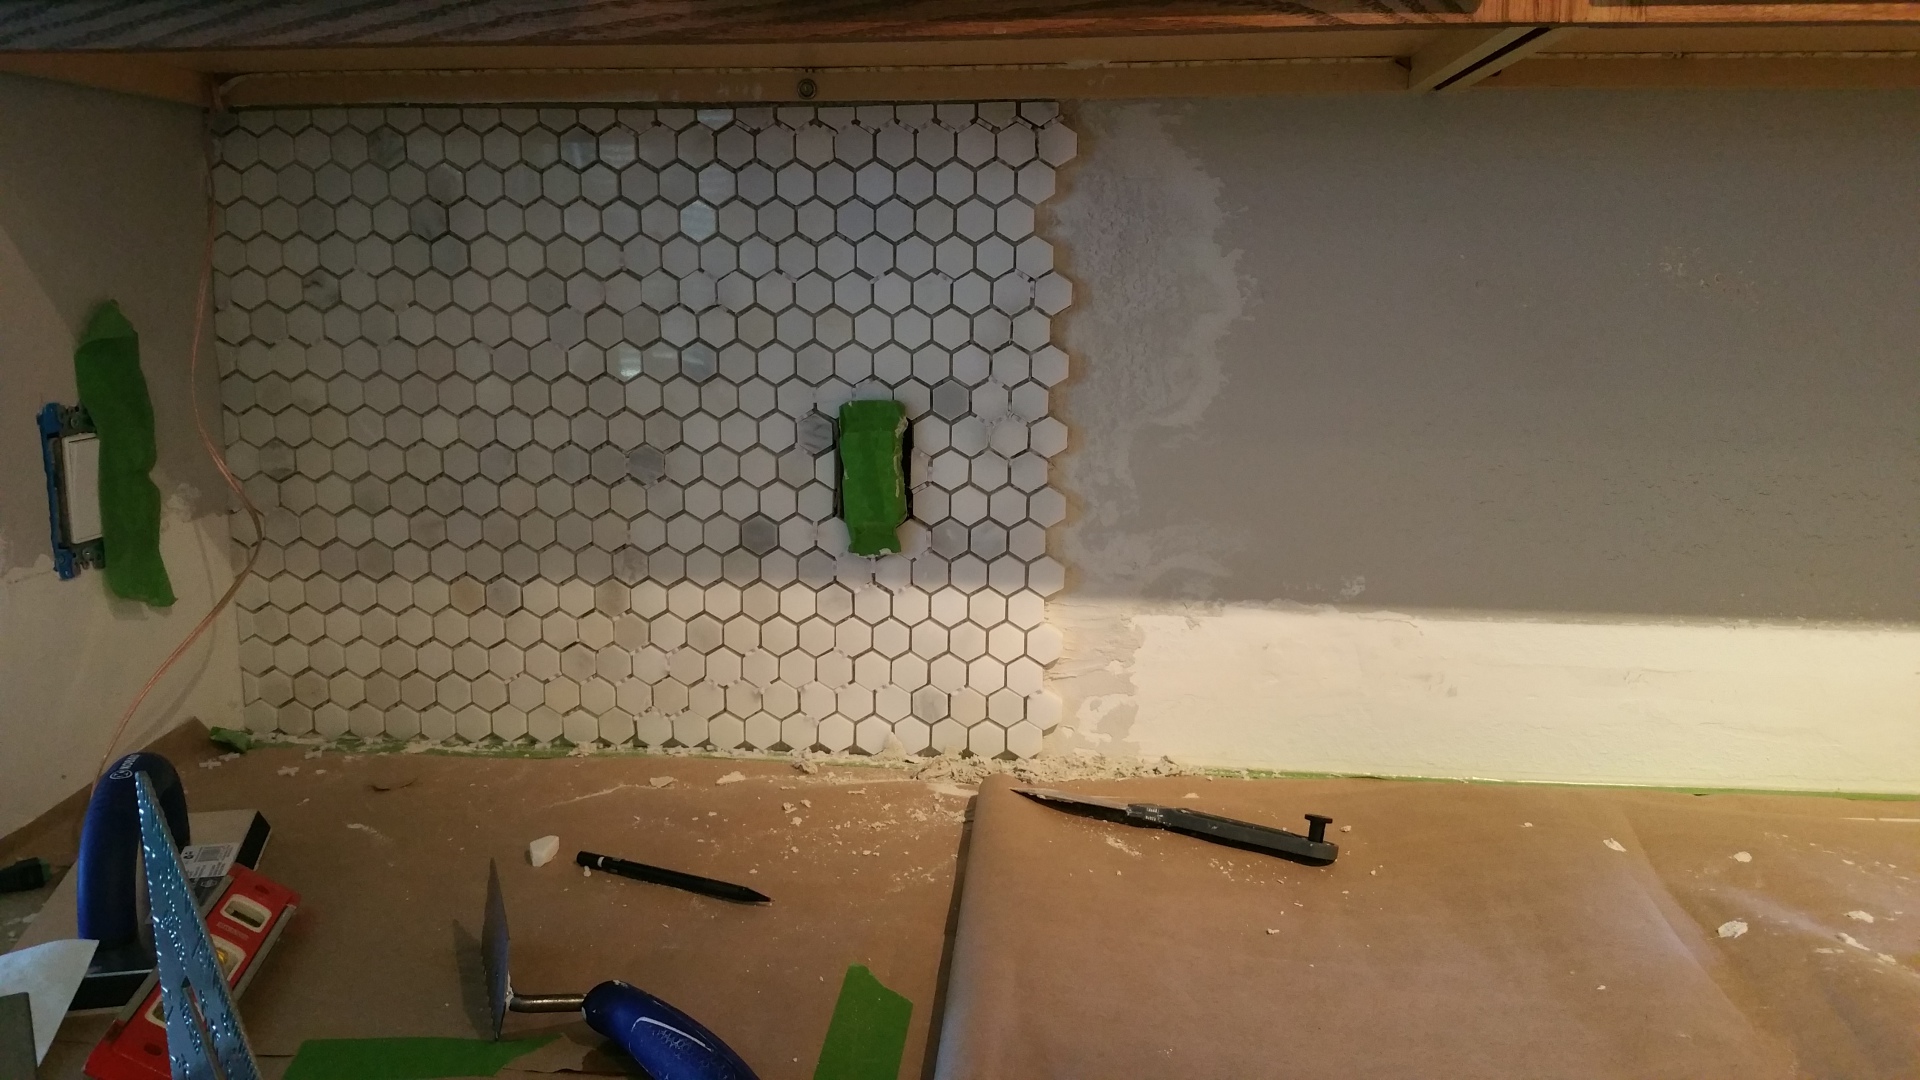
Okay, and that is the end of day 1. Seriously. I’m not kidding. I warned you. What you see here are 4 sheets of tile. When working over an outlet, you simply cut out the tiles that are in the way with scissors, then you piecemeal your tiny cut pieces all around the opening wherever you need them. This is just one example of where your little cut bits come in throughout this project.
We didn’t get to this part of the project until the very end of the day on day 1. 1. because I was afraid of the saw and 2. I spent the greater part of the morning trying to get out of using said saw.
Please check out the completion of this project in part 2, and have a happy DIY.

Leave a Reply